
Way back before i was a plumber i used to work a hawk and trowel. Tap on the molded stucco around the window. Sound hollow/lightweight? Its likely EPS (extruded polystyrene) around the windows, with a true lath/scratch/brown buildup and 1mm finish coat on the walls. Details around windows etc are usually styrofoam.
US based? Finish coat is either Dryvit or STO id bet.
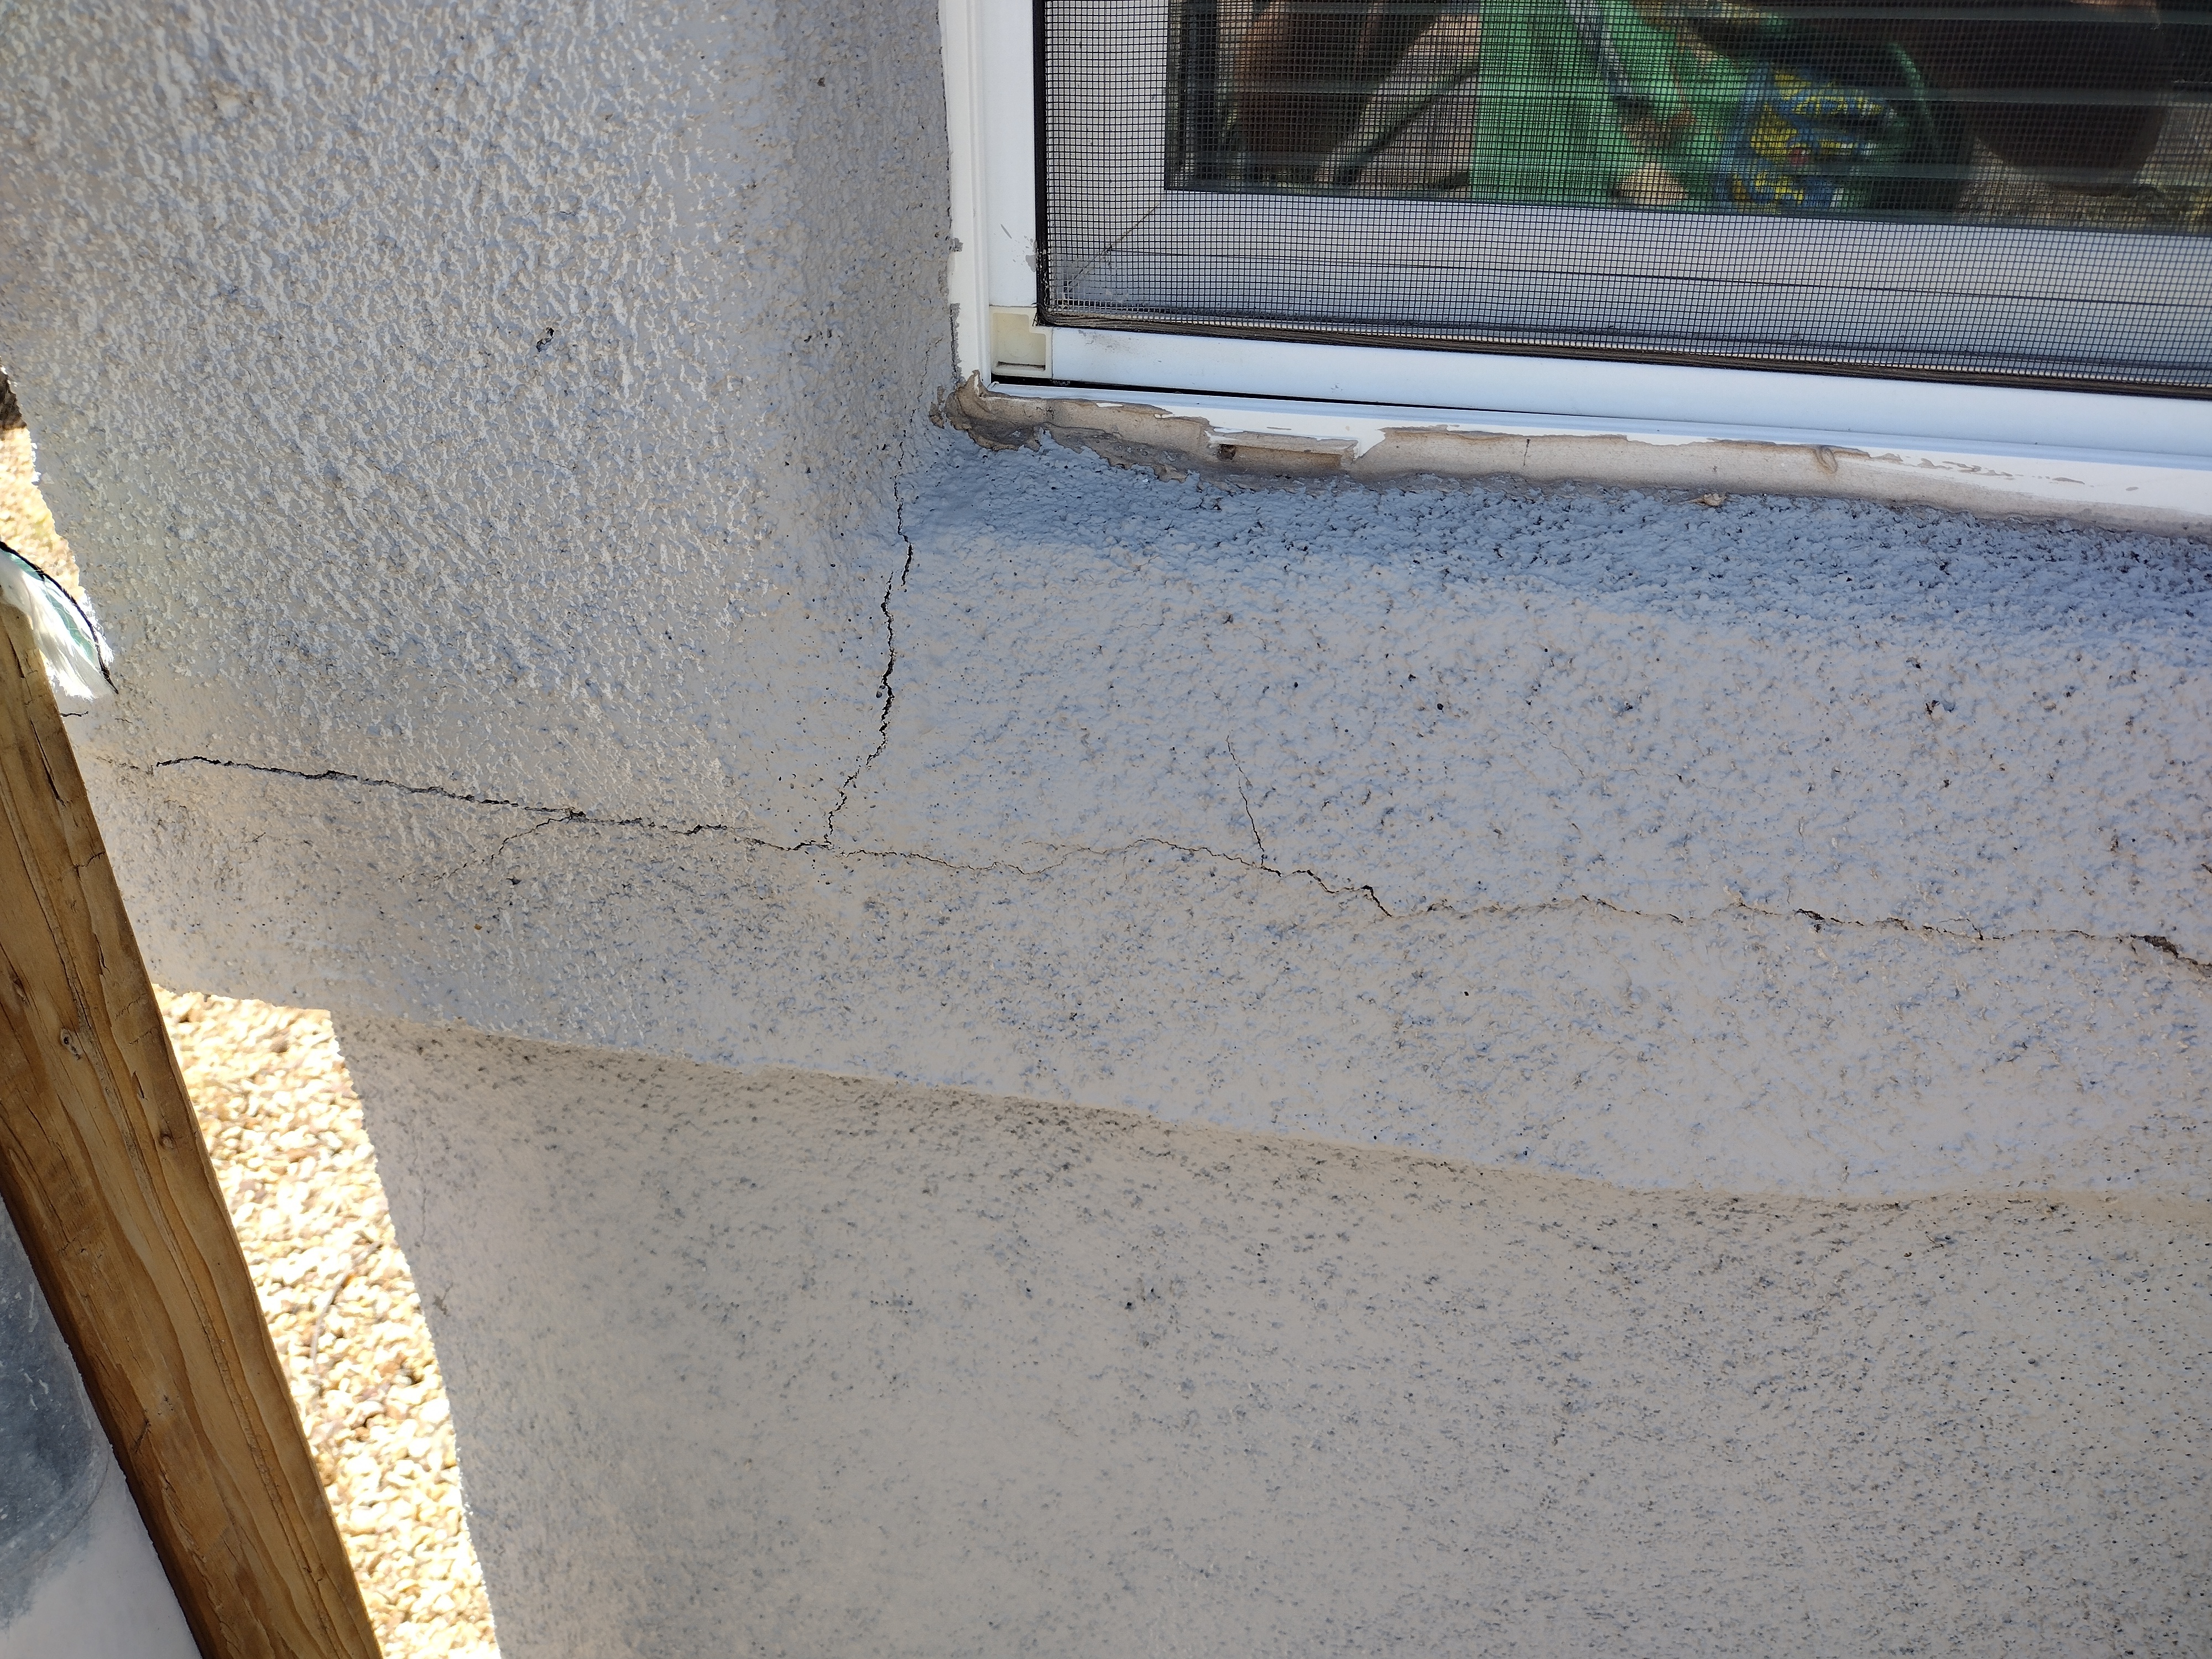
That cracking around the window area makes me concerned for water ingress/sheathing rot. The EPS gets backbuttered or screwed into the stucco after its been brown coated, then a thin thin thin layer of watertight 2 part coating goes over the EPS, with a fibermesh to give some rigidity. The waterproofing may have gotten cracked with age, or been poorly applied from the jump.
Take a rat tail grinder, enlarge the crack, following down til you get to something solid, whether it is sheathing or stucco. Next step likely goes one of two way depending upon what you find under that crack. Stucco is loose, or fractured, etc? Cut it all out. Cut on the bottom side of the overhand. Cut out everything bad. Cut out a area larger than the damaged area by an inch or two. Peel all this out, concrete, lath, etc. be cery very careful when removing the lath. It cuts fingers very easily. Ive had hands stitched myltiple times from lath accidents.
Expose sheathing. Assuming it is is in good shape, and the capor barrier is still intact w no holes, you need to get some lath, laid flat against the vapor barrier. Attach with screws. Stainless is ideal, but galvanized/coated is acceptable. Be careful on length of screws. You never k ow whats behind the sheathing that you cannot see.
After lath goes up, mix one part sand/one part type S/one part portland cement. This is your scratch coat. Its very low sand content makes it set up quickly, and like a damned rock. Brown coat goes over that. Two parts sand to one part type s/one part Portland cement. Brown coat needs a couple hours to dry up (surrounding stucco will suck water out of fresh cement and cause it to set more quickly. When whole walls are done you let each coat set overnight)
Ideally, you want to go back over the brown coat with a finish coat (old school guys do a lime finish, new school uses premade 5gallons buckets of finish with the aggregate added already. You have it tinted to match, ideally.
Since you likely dont have trowels/floats and the like, id just build the brown coat up to the finish coat’s level, then head to a big box store and have the lm match a quart of paint to the finish coat’s color. Getting the finish coat to match whats there properly is art work.
If you have the fortitude, and the money, you can do this repair yourself. Portland, type s, lath, playground sand, vapor barrier etc are all available at big box stores. I think you can find the waterproofing there too. There may be a corner bead at the bottom edge. Depends on how well k work was done. Corner bead can be had too. Otherwise, find a local stucco guy.
Feel free to ask questions and ill answer them. Im running service calls so it may be a bit, but i gotcha.
Thank you so much for taking the time to give me such a well detailed walkthrough, this is incredibly invaluable to me
Are there any cracks / fractures on the inside of the building or on other sides of the structure? Is there any deformation of the walls, like warping inwards or protruding outwards? What is that blue line, some kind of marking? Does this side of the building face the sunrise, and what are common temperatures this building has experienced?
It does face the sunrise, and it experiences extreme heat in the summer. The interior doesn’t have any cracks like this, and otherwise no protrusions that I can see. The blue line I think is just incidental, the color that shadows cast at the time I took the picture
Yes generally normal for hairline cracks to form over time. Just use high quality caulk and fill it in. You can use a bit of water to make it easier to press into the cracks. Wipe off the excess before it dries. Then paint over with exterior paint
No, hairline cracks in stucco are not normal. The finish coat stretches. The lath underlayment secures everything from movement. It is cement, but not the same as a slab, walkway etc.
I was a plasterer for a decade or so before i left it to be a plumber.
deleted by creator
Caulk is temporary at best here. Underlying issue, which is probably water ingress, needs addressed first IMO.
deleted by creator
Water ingress is always the problem.

